Skunk Works

fighterJet.png

The first thing we’re doing to test our approach to stylized production in Unreal is testing it out with an existing project, in this case the Monkey project me and Chris worked on for Vintata in 2016.

Here’s the original:

And here’s a new version, remade in Unreal:

...and proof that it’s all real-time:

The two versions aren’t visually identical--you may note the lack of fur tufts on the tail in the Unreal version, for instance, and the Unreal version has somewhat wiggly two-tones as we haven’t implemented any normal adjustments yet—but they’re very close in process. Except, of course, that the Unreal version is vastly faster to assemble and tweak.

There are two major things I wanted to accomplish with this stage of the pipeline. The first is to be able to build up a shot from an user-defined set of compositing passes, just as we would if we were rendering out passes from Maya and using a compositing app. The second is to be able to have a separate composite per-shot, so that we can accommodate per-shot tuning of the composite and shot-specific elements, and still be able to see multiple shots in Sequencer in real time.

Unreal already has a lot of the machinery needed for these goals built in. Composure, Unreal’s real-time compositing plug-in, lets you establish render passes (called “elements” in Composure) that will render any set of actors in the scene, and you can then use the extensive set of shader nodes in Unreal’s material editor to create compositing layers (called “passes” in Composure, which I imagine to be a clever tribute to Abbott and Costello). And Sequencer allows you to make any actor a “spawnable,” which will spawn into the scene just for that shot and vanish when it is not needed. This is a very strange way of thinking about scene assembly from a DCC perspective--imagine Maya was loading and unloading references during playback!--but makes perfect sense from the perspective of a game engine, which of course must be able to spawn alien zombie mercenaries at any time and then remove them after you have mercilessly slaughtered them. Since you can do this with any actor, including cameras and lights, this lets you have a lot of control over the specific contents of any shot.

However, there are a number of ways in which the default machinery falls short of what we need for this workflow. Composure allows you to create elements that render any set of actors in the scene from any camera, but it offers no control over how those actors are rendered. This makes essential concepts like separate light and shadow passes impossible with the default system. And while spawning and de-spawning most types of actors through sequencer works great, doing it with Composure elements breaks the links between a composite and the elements that contribute to it, so that’s not a viable workflow when combined with Composure. Leaving multiple composites in the level isn’t a good plan either, as elements will impact performance even if their output isn’t currently being viewed, and you probably don’t want about a million elements clogging up your level anyway.

Luckily, Unreal is also a game engine, which means being able to easily modify the behavior of any actor is sort of it’s point. This makes it surprisingly easy to come up with hacky solutions for these problems, though more robust ones would be more difficult, and possibly require forking the engine. For the moment, we’ve decided to stick with hacky solutions, and evaluate whether more robust ones are necessary as we go.

Because the Composure “CG Layer” element class is a Blueprint, it was very easy for me to get access to its inner workings so that I could insert something immediately before and after the element renders. One possible way to use this ability would be to assign a specified material to all the actors being rendered by the element, and then reassign back to the original material immediately after the render finishes. This might work, but it would involve doing a lot of bookkeeping about what material was assigned to each actor. We decided, instead, to make an uber-material on which all the materials in the scene would be based. This material would already know what material settings it should display depending on what pass was currently being rendered.

materialx.PNG

The material has multiple Material Attributes sets, and it chooses which one to use to render the surface based off of global Material Parameters:

materialXparams.PNG

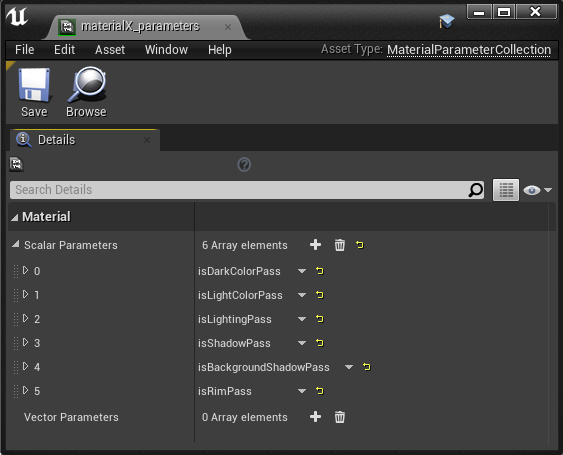
Because these parameters are global, I can have the composure element blueprint just change the parameter once and all materials will be affected. That’s as simple as this:

enableMaterial.PNG

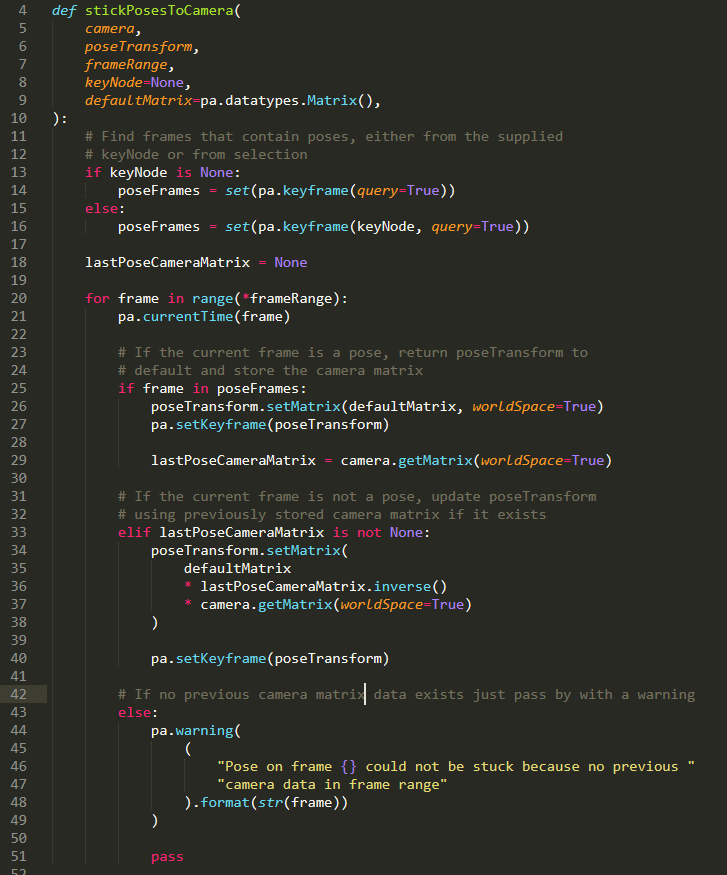
To control what lights apply to what elements, I added a variable to my special element class that lets the user link a light to it:

captureLights.png

And any lights that are linked can have their visibility (and therefore their effect on the scene) swapped on and off (note that this function also calls the EnableMaterial function shown above when it’s done).

enableLights.png

Then the lights and materials can be enabled and disabled immediately before and after rendering.

sceneCapture.PNG

What you get from that is the ability to have separable lighting passes that render with a blank white surface, and give you a result you can manipulate in the composite and then combine with color passes.

lightingPass.png

How about shadows? One of the things I think is really important to be able to do for this kind of stylized rendering is have shadows that are projected from a different location then the light they occlude. That means being able to get separate shadow passes, something that’s quite common in an offline renderer that’s spitting out AOVs, but which doesn’t seem to be possible to get from Unreal without creating a custom shading model--you can access the passes Unreal writes to the gbuffer for it’s deferred rendering (such as normal and depth) directly with a SceneTexture node, but Unreal does not appear to create separate lighting and shadow passes in the gbuffer, so you’d need to create a shading model that does (or, more likely in this case, somehow outputs different results based on what element is currently being rendered, since SceneTexture does not appear to work correctly when used in a Composure pass. In fact, since we can’t get anything useful out of the gbuffer anyway and many passes use no lights at all, I switched from deferred to forward rendering for a significant improvement in frame rate).

Ultimately, creating a custom shading model may be the right thing to do, but it would take significant effort. For the moment, I’m instead using a hack so grotesque that I hesitate to describe it, lest it’s sheer ugliness drive the reader to acts of madness and despair. I create two lights, identical in every respect except that one is red and casts shadows, and the other is blue and does not. Then I take the resulting image and divide the red channel by the blue, thereby canceling out the lighting and extracting the shadow alone.

This is an abomination…but it does work.

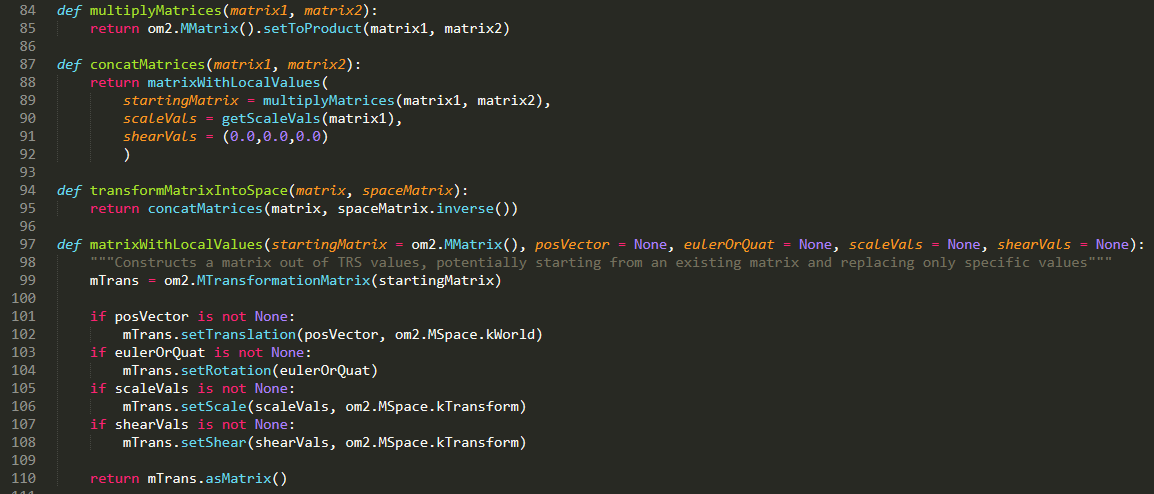
Finally, I’ve created a set of “passes” using the material editor that can receive the results of each element. That includes the base composite that uses the lighting and shadow elements to blend between light and dark color elements with a user-definable two-tone threshold, and passes that allow the user to layer rims and additional shadow elements on top.

compPasses.PNG

As an example, the base comp pass looks like this:

baseComp.PNG

That gets us an almost final result, but we still have to deal with anti-aliasing. Unreal supports both FXAA and MSAA for in-engine anti-aliasing, but they’re not useful here--they’d be applied to each pass rather than the final composite, creating a variety of edge artifacts familiar to offline compositors, but which we do not want to have to manage here. In this case, working with unantialiased passes is actually a significant advantage. Using Unreal’s new high-quality offline rendering feature--which creates high-quality anti aliasing and motion blur by accumulating the image from multiple, slightly different renders--would also be an option, but unfortunately it does not seem to support Composure.

So instead, I’m simply rendering everything at 4k. Then, after the fact, I’m running FXAA on the frames in After Effects and reducing them back down to 1080p. The combination of FXAA and bicubic scaling produces pretty nice anti-aliasing, and while it does necessitate an offline pass on all rendered frames before they’re final, we can still see something that accurately represents every aspect of the final image other than anti-aliasing in real time.

To be honest, I’m not entirely comfortable with the level of hackery going on here. It reminds me far too much of the way rigging, as a field, has largely been built on top of ancient hacks used to kluge together the features that already existed in the software of the time into something that halfway worked—and how the entire field has been poisoned for decades by the legacy of those hacks. On the other hand, hacks are also how you get things done without a dedicated development team, and they’re often how you eventually get to something that is actually engineered well. It’s just always important to remember that your hacky solution has put you deep in technical debt, and be ready to put in the work to pull yourself out of it when you need a more robust solution instead of trying to spackle over the holes like rigging did.

Next time, we’ll talk about how to set this up for multiple shots in sequencer.

The Return of Just to do Something Bad

llamas.png

It has been quite some time since this blog was updated! One could perhaps be forgiven for assuming that, in the madness of this dread year 2020, I had met some strange and inexplicable fate--press-ganged into an intergalactic war, perhaps, or devoured by feral llamas. Well, I’m happy to report that all rumors of my demise are entirely erroneous. I have merely been ensconced in my laboratory, biding my time until I could unleash, upon an unsuspecting world, these strange and foreboding announcements.

To begin with, I’m pleased to announce that Epic Games--the proud creators of a powerful Engine with a startling ontological status--have seen fit to award Chris Perry and I a MegaGrant for the creation of a pipeline for nonphotorealistic animation production using Maya and Unreal.

Epic_MegaGrants_Recipient_logo.png

This has been a dream of ours for quite some time, going back to our work on The New Pioneers test. This test demonstrated that rapid CG animation production using interpolationless animation, illustrated backgrounds, and stylized rendering was viable. It also demonstrated that it was a lot less rapid than it could be. A lot of that came down to the need to manage each shot through a rendering and compositing process to create the final look. The renders themselves were fast (though less fast then you might think--we were using Mental Ray to do the passes at the time) but the assembly and tuning of each shot still took much longer then it should have, using complex After Effects comps that were far from real time themselves with lots of passes per character that had to be managed properly for every shot.

None of this seemed like a technological necessity of any kind, given that game engines routinely crunch through far more complex rendering and compositing math for every frame of almost any game in real time then we needed to do here.

To give you some idea of what this process was like, here’s a video showing some of the passes rendered for the monkey test we completed after New Pioneers.

The process of assembling the final shot from these passes makes assumptions that are very alien to those made in any kind of conventional CG rendering, real time or otherwise. For instance, the monkey’s main light is occluded by a shadow that is projected from an entirely different vantage point then the light itself, and there is an additional shadow pass that doesn’t occlude any light at all--it’s just applied to darken certain areas. That’s because, when doing graphic-looking work like this, the light and shadow serve very different purposes. I’m angling the light to give the best two-tone, while I’m angling the shadows to silhouette different aspects of the monkey's body to make them read clearly (the arm against the body, for instance).

Similarly, a surface’s normals are usually intended either to represent the surface as accurately as possible, or to represent a higher level of detail (as with a baked normal map). But to get a decent two-tone, we need the normals to represent a surface that’s simpler than the actual mesh. This is one of the areas of our process we’re planning to iterate on, because the methods we used on The New Pioneers and the monkey test still required some manual masking in the composite and we think better methods are possible.

Unreal isn’t designed to do this kind of trickery out of the box, but it is far more easily extensible then any traditional DCC and renderer, and our initial tests have been very promising. As we continue to develop real-time techniques around NPR in Unreal, you can expect this blog to shift somewhat from focusing almost exclusively on ephemeral rigging and interpolationless animation to a bigger focus on NPR--which, as you may note from the logline, is something I’d always meant to discuss here in any case.

That said, there’s still going to be plenty of ephemeral rigging to show off too. The other announcement I’d like to make is that, over the past six months, Tagore Smith and I have been working on Mark 3 of the ephemeral system. The previous prototypes I’ve shown have been experiments with some awkward edge cases that might make them difficult to put into full production: Mark 3 is intended to be a robust and production-ready implementation of the system without the issues with performance, parallel eval, and multiple selection that plagued Mark 2. Tagore is ensuring that this version has a well-engineered structure, so that it can be a stable basis to build future features on. The core of the system has also been separated from Maya, meaning it should be much easier in the future to implement it for other “host” applications. We mean to make this version available commercially in some form, although the details are still being worked out.

More lessons from Peter B. Parker

peterb.png

Working with a variable pose rate (ie. a mixture of 1s, 2s, and 3s) is a huge advantage both aesthetically and technically, but it presents some problems. Issues with simulation and motion blur don’t apply to the work I’m doing right now, but issues with camera movement remain.

Consider this shot, the first to go into production on a new project I’m doing with Chris Perry.

Strobe city. The character has been animated with a variable pose rate, but the camera is on 1s. The camera kind of has to be--the aesthetic qualities of on-2s character movement let the audiences eye fill in the blanks, but moving over a static environment will just look weird and stuttery.*  The problem with this is that any time the character’s movement aligns with the camera’s, it’s going to strobe terribly as the camera gets ahead of the character on the frames where the character’s pose is held.

There are a few naive solutions, but they come with their own problems. You could just inbetween down to 1s, but then you lose all the advantages of a variable pose rate. You could parent the character to the camera, but then you’d lose the ability for the character to interact effectively with stationary objects, and every modification to the camera movement would change the character’s relationship to the environment. The character grasping the pole in this shot would have required counter-animation, and nobody wants that!

Luckily, Sony developed a much better solution for Spider-verse, and I had the chance to see the solution explained at the Spider-verse panel this SIGGRAPH. Basically, they could “stick” poses to the camera, so that the held frames pick up the camera’s movement, without changing the poses themselves.

Ever since I’ve been thinking about how to implement a similar tool myself, and this shot was a perfect test case. It actually turned out to be surprisingly simple:

cameraStickyCode.PNG

What’s going on here is that the script is moving through each frame in the frame range, and as it goes it keeps a record of the camera’s matrix on the last pose it encountered (poses are defined either by the keys on the optional “keyNode” or the keys on whatever’s selected). On frames between poses, it updates the position of the “poseTransform”--a single transform set up to offset the character’s geometry without affecting the rig--using the difference between the camera’s matrix on the last pose and the camera’s current matrix, effectively dragging the pose with the camera. Then, when a new pose appears it returns the poseTransform node to its default location, ready to be dragged again. If the camera or poses are adjusted, you can simply rerun the script.

As in other code snippets on this blog, I’m importing PyMEL as “pa” rather then “pm.” which is a little unusual but became such a tradition at Anzovin Studio that I’ve stuck with it. This tool would run faster if I was using om2, but for something that’s already really fast it didn’t seem worth it.

Looked at from an objective point of view, the result ends up looking like this:

But looked at from the camera’s point of view, it looks like this:

It does a pretty amazing job getting rid of the strobe issues. I’m only running it up to frame 188, so that her hand doesn’t slip around too much on the pole once she grasps it. However, that does include the section of the shot between frame 160 and frame 188, where she grabs onto the pole but is still moving upward. Interestingly, even though her hand does slip around on the pole during this section due to the camera movement, it’s not very evident to the eye. They discovered this on Spider-verse too--they’ve got shots of Miles walking down the street on 2s while the camera tracks with him on 1s, and as long as the poses “stick” and his feet aren’t central to the shot it works fine, even though his feet are slipping all over the place. If the motion and character design are stylized and graphic in the right way, your eye just forgives these kinds of issues, the way it’s always forgiven them in drawn animation. That’s very different from the assumptions that underlie conventional CG.

It looks like they use a few variations of this approach in Spider-verse. In some shots, for instance, it looks like they are sticking the pose’s translation to screen space but allowing its rotation to continue to diverge from the camera, which seems particularly useful in cases where the camera rotates around the character. This would be pretty easy to implement if I end up needing it, but for now it looks like this script, simple though it is, should effectively solve the strobing issues I’m likely to encounter on this project.

*I’m actually considering the idea that 24fps may be insufficient for some camera moves--the idea of a camera on 48fps while characters have a variable pose rate that varies between 48 and 6 fps is something I’d like to experiment with.

Here's my SIGGRAPH presentation

Here’s SIGGRAPH’s recording of my presentation, published along with the abstract in the ACM Digital Library at https://doi.org/10.1145/3306307.3328165

I kind of hoped they’d have had a camera, but regardless this is the presentation just as I delivered it, which unfortunately means it’s full of ums and ahs that I don’t remember saying on stage. Maybe I’ll give it at some other conferences and do some public speaking practice first—if you know of anyone who’d be interested in an expanded version of the presentation (SIGGRAPH limited it to 20 minutes) please let me know!

Maslow's hierarchy of animation editing tools

paino.png

People who are really experienced with text editors like vim and emacs can play them like a musical instrument. Open and closing files, navigation, find and replace, etc all just sort of magically happen while they type, without apparent cause.*

This kind of frictionless experience, where the UI gets out of your way and you can just do what you want, is what I want the animation process to be like. There is some low-hanging fruit in this regard that is already pretty common in conventional rigging--custom pick walks, for instance. But it usually doesn’t go very far beyond that. That’s because current animation techniques don’t generally rely on things that can be done with a keystroke you could commit to muscle memory. Instead, most operations you’d do with a conventional workflow require a lot of context (like, is this arm in FK, IK or somewhere in between on this frame?) and multi-step processes.

Creating an animation process that can be reduced to simple operations is a big part of the goal of the ephemeral/interpolationless approach. In trying to define the best ways for the animator to interact with the rig and animation data, I’ve ended up with a sort of hierarchy** of different ways of manipulating a character.

Modes

At the very top of the hierarchy is what I’m referring to as a Mode. A mode is for interacting with the rig in a particular manner, and all modes are mutually exclusive. You can interact with the rig in Forward mode, or Backward mode, or IK mode, and once you have done so the rig’s transforms have now been moved, but nothing else has changed.

A mode is, in my view, a superior animator interaction concept because it is completely “fire-and-forget.” What mode you’re using is only relevant while you use it. The system doesn’t remember what modes you’ve previously used, which means that you don’t have to remember either. Interacting through a mode is truly and completely ephemeral.

Options

If you can’t do something with a mode, you use an option. An option modifies how modes are used. In the current ephemeral system, for instance, you can choose to “suspend” intermediate controls such as elbows and knees for psudo-IK behavior, and it will do so whenever the mode you are in does not explicitly prohibit it (for example, Forward mode quite naturally insists that an elbow must be FK rather then suspended). You can also choose not to suspend them, and have elbows and knees maintain their position for completely free interaction of hands and feet.

This is slightly less good then a mode, because it’s not completely “fire-and-forget”--the option remains set until you change it, so you do need to remember what the options you’ve set are or you’ll get suspended behavior when you don’t want it or vice-versa. But because they are character-wide, you only need to remember a few of them--the current system has four--and it’s easy to display how they’re set in the UI in a way the user can understand with a glance. And if you get it wrong, it’s a couple of key strokes to undo, change the setting, and keep going.

In the future, I want to explore having the options depend on holding keys down rather then switching with a hotkey--this could make remembering what options are currently set even simpler, since you know they won’t be set unless you actively hold down a key.

Setting

If you can’t use a system-wide option, use a control-specific setting. This isn’t great because it requires that you consider how things behave on a control-by-control basis, but sometimes it’s unavoidable. The ephemeral system uses per-control settings in only one place--when establishing pairs between controls for interaction between a character and a prop, or a character and another character. I may end up needing to use them in other places as I expand the features of the system though.

Time-based setting

The absolute worst thing you can do is have a time-based setting. A time-based setting changes the behavior of the rig at particular points in time. Conventional FK/IK switches and space switches are all time-based settings, and they require the animator to keep track of rig state in multiple dimensions. First, what things are being switched? And second, when are the switches happening?

As any animator who’s done complex prop interaction using constraints can tell you, time-based settings are a special kind of hell. It’s so bad that many animators--myself included, depending on the situation--may choose to manually eyeball the relationship between a hand and prop just to avoid dealing with the pain that is space switching! I’ve come to believe that the ideal interface for animating characters would avoid time-based settings completely, and I don’t currently use them anywhere in the ephemeral system.

This is a set of ideas that takes some getting used to. When other riggers first encounter the ephemeral system, they often ask me why it’s not primarily setting-based. “Wouldn’t you want to offer the animator the ability to switch one arm to FK and the other to IK? Why wouldn’t you let them choose how breakdowns are made on a per-control basis?” However reasonable this sounds--and it does sound very reasonable, from the perspective of rigging and animation tools as we know them--the answer is no. I do not want to offer the animator that ability. As an animator, I do not want to have that ability.

As I’ve done before, I’d like to make an analogy to digital painting. You could theoretically program a painting tool to change brushes based on the layer or region being painted, which is (albeit weakly) analogous to telling the rig to behave a different way depending on the current time. You generally wouldn’t though. The additional cognitive load of remembering what everything was set to while you work wouldn’t be worth it. It’s easier to just change the settings of the brush to be whatever you need them to be right now, for what you’re about to do next. This becomes even easier if you bind whatever brushes you use to keys, and commit the key strokes to muscle memory. Once you can change how you interact in a quick and transparent way, the idea of trying to do it automatically becomes much more questionable.

Remember our graph of complexity against difficulty from Why Keyframes Are Bad For Character Animation? Well, we can make a similar graph for setting-centric vs mode-centric interaction models.

setting-mode_graph.png

Just like with our previous example with keyframes vs dense data, the utility of time based settings goes down as “complexity”*** goes up. For simple things they’re actually great, but in the context of full character animation they’re a disaster.

This introduces something I’ve begun to think may be an important principle for animator interaction: Things that are easy to do are also easy to do over.

As an example, the current ephemeral system lets you make breakdowns in either default (ie ‘IK’) or Forward modes (I intend to expand the breakdown system to allow other modes, such as Backward, as well, but doing so requires a bit of extra bookkeeping and I probably won’t implement it until the next iteration of the system). But using forward mode commonly does various things you might not like, such as interpolating the feet such that they move through the floor.

The traditional answer to this would be to introduce control-specific settings. You could tell some controls to interpolate linearly and others in Forward mode. But there’s a simpler answer--if some part of the character does something you don’t want, just do that bit again!

Doing two operations like this seems much faster to me, from both a cognitive and operational standpoint, then doing one operation that requires you to muck around with per-control settings--especially since you’re very likely to end up doing two operations anyway after you inevitably screw up the settings the first time.

Animation tools have been driven by the concept of “more control” for a long time. The problem with this conception is that “more control” is a multidimensional concept. More direct control over a character’s silhouette? Very important. But fine grained control over rig behavior at the animator level? Actually, that may not always be a good thing. If we want to create better animation tools we’re going to have to learn something UX designers learned a long time ago: sometimes less is more.

*Despite rumors to the contrary, most vim and emacs users achieve their mastery of the text editor through a comprehensive set of key-bound commands. The percentage of the userbase that consorts with dark powers beyond human understanding is actually very small.

** You know I hate hierarchies, but this hierarchy is good, I promise. It’s like a turncoat hierarchy that was raised by kindly old people, and now hunts its own kind to protect humanity.

***As in my post on keyframes, “complexity” here doesn’t refer to visual complexity, but rather how “composable” the data you’re trying to create is. Motion graphics and graphic design are very composable--you can break down complex visuals into simpler pieces that will be composed into the final image/video. Painting and character animation are not easily composable, so I’m referring to these mediums as, for lack of a better term, “inherently complex.”

A Modernized Methodology for Magical Mustelids

otters.png

Hey, the first paid project I ever did with the ephemeral system is online!

I used the system to do this ad for Significant Otter:

I also used it to do the in-app otter animations, although in somewhat modified form—because we were originally planning to make the in-app animations 60fps, I couldn’t do them interpolationlessly (as I did for the ad above). So I tried out just taking the ephemeral controls—despite the lack of hierarchy—and simply splining them as-is.

Surprisingly, this actually worked pretty well. It wouldn’t be my preferred approach to most things, but it does have some advantages. For instance, since all controls are in world space and the camera never moved, the graph editor actually becomes a lot easier to use. Y means up in screen space, X means across in screen space, no exceptions. Of course that also means that, as far as interpolation is concerned, the controls have absolutely no relationship to each other at all. For this kind of very lose, cartoony animation, that turns out to be fine!

I’ll post some of the in-app animations too once I get permission from Pine Labs.

SIGGRAPH epilogue

SIGGRAPH was an incredibly positive experience, and I had many conversations that will shape the future of what I want to do with ephemeral rigging/interpolationless animation. I’ve even almost recovered from the inevitable post-convention plague!

SIGGRAPH tells me that recordings of my talk will be available publicly, but probably not till October. In the meantime, here’s another speed animation recording of the Chandelier Swing test shown as part of the presentation. I’ve annotated this one with some notes on how I’m using the system, and overall animation technique.

In addition, I realized that anyone who clicked on the link to my Powerpoint slides was probably viewing them on Dropbox. Unfortunately the Dropbox viewer doesn’t play video, which was kind of essential to the presentation! One could always download the file, but for those who don’t have Powerpoint or want to get a Microsoft account to use Powerpoint Online I’ve added some of the videos to my Vimeo:


SIGGRAPH 2019

Eleanor Rigging-by is happening at 2pm in room 153! Be there, or you will surely be a polygon with four vertices and four edges of equal length (all of which are at right angles to each other).

If you nevertheless can’t make it—if, for instance, like the majority of people in the world you are not at SIGGRAPH—I’ve posted my slides and notes here.

The hour draws nigh!

If you’re at SIGGRAPH, don’t forget to step into the “Eleanor Rigging-by” session in room 153 to hear me pontificate! It’s on Wednesday at 2pm.

Here’s another piece of example animation I’ll be showing:

I recorded the making of this one, and plan to post an annotated version after SIGGRAPH. It took me about six hours total.

Why keyframes are bad for character animation

zog.png

One of the somewhat controversial opinions I’ve expressed in this blog is that keyframe animation* is bad and should be replaced with raw poses. I’ve always been a little bit vague about this though, without a clear statement about why exactly this is. That’s because it’s been more of a feeling than anything else, a frustration with the futzing around with keyframes we’re all forced to do when animating.

I recently submitted a talk proposal for SIGGRAPH 2019, and this required me to be much more rigorous about stating what it is exactly that I think is wrong with the process, and it clarified my thinking. I now think that you can boil down the issues with both keyframe animation and hierarchical rigging to this statement:

Animation curves and a rig together form a system that generates character motion. Animators do not create motion--they edit inputs to that system in the form of keyframe values. But with conventional keyframing and rigs, you cannot, by looking at the end results, understand the system and inputs that produced them.

Everything wrong with the keyframe animation process flows from this basic fact. Crossing effects between multiple layers of control, unwanted spline behavior, the mess created by space switching and FK/IK switches/blends, even gimbal lock issues--these all reduce to the fact that there is no one-to-one relationship between the inputs and the result, and the animator must therefore mentally model the keyframe/rig system to understand what inputs will produce the desired results. But, since multiple possible sets of inputs (ie. different combinations of key placement and rig state) can produce visually indistinguishable results, that mental model degrades extraordinarily quickly, and sussing out the real relationship between inputs and results requires constant attention and interpretation. This is true even for a “blocking plus” process, as the moment you spline generally reveals on even a very tightly blocked shot.

Put this way, the entire history of CG animation technique sounds completely insane, doesn’t it? Why the hell is this how we decided to animate characters? Why would anyone think this was a good idea?

There are multiple factors involved, but I think a lot of it comes down to what I’ve begun to think of as the “nondestructiveness problem” in computer art. “Nondestructive” in this case might also be described as “parameterized” or “procedural”--basically any case in which the end result is continually regenerated from a set of inputs that can be altered at any time. Nondestructive techniques are one of the major advantages to doing art with a computer...except when they aren’t. A nondestructive technique that in one instance allows you to do the work of ten artists working with more traditional techniques will in another instance absolutely cripple your ability to get anything done at all.

As an example, let's say you’re designing a logo, something along these lines:

branch.png

This is a flat shape with very well defined, simple curves. I did this in Illustrator by placing down bezier handles, because that’s the obvious way to approach something like this. If I’d tried to paint the shape it would have taken forever to tune the shape to the right curvature, and I would probably have ended up with something that looked a bit wobbly no matter how long I worked on it.

Clear win for the nondestructive technique, right? Tuning a simple shape through bezier handles is much faster then painting it. Now imagine a completely naive observer, a hypothetical, possibly alien intelligence that has never encountered this thing you Earth people call “art” before. Such a being could be forgiven for concluding that a nondestructive approach is always correct. Something that can be quickly adjusted just by tweaking a few bezier handles has got to be better than thousands of messy pixels.

Listen, Zog...can I call you Zog?...let's put that idea to the test. You’re an alien superintelligence, so you should be able to use Adobe Illustrator, which was clearly designed for your kind and not for actual human beings. Only I don’t want you to make a logo. I want you to make this:

This background, used in the Monkey test me and Chris Perry produced for Vintata, was painted by Jeet Dzung and Ta Lan Hanh.

This background, used in the Monkey test me and Chris Perry produced for Vintata, was painted by Jeet Dzung and Ta Lan Hanh.

Kind of a different situation, isn’t it? When drawing clean shapes vectors are the obvious choice, but trying to paint by placing bezier handles down for each stroke is immensely inefficient,** even to a being of Zog’s incalculable intellect.

Now this doesn’t mean that nondestructive techniques have no utility for digital painters at all. Layers, for instance, are clearly very useful. And yet, the number of layers you can keep around and still have something useful to interact with is actually pretty limited. Dividing a painting into foreground/midground/background or into layers for tone and color makes sense. Making every alteration you make to the painting into a new layer, on the other hand, leaves you with an incomprehensible stack that you’re going to end up having to either collapse, or basically leave in place and never modify (in which case you might as well have never done it at all). It’s the same problem with keyframes--the mapping between inputs (the pixels in each layer) and output (the final image) is too complex to hold in your head, and eventually it becomes more work then treating everything as a flat image. Compare this to CG modeling, where surfaces generated from control points (such as NURBs and subdivision surfaces) make modeling and adjusting simple shapes very easy, but are vastly inferior to sculpting tools that use micropolygons or voxels when it comes to a complex shape like a character.

I think of nondestructive vs destructive means of creation as being on a graph like this:

destructive-nondestructive_graph.png

When complexity is low, nondestructive techniques are clearly superior, sometimes by a lot. But the difficulty of using nondestructive techniques increases exponentially as complexity increases, where destructive techniques increase linearly. There is a point at which the two lines cross, and a primarily nondestructive workflow (as opposed to a mostly destructive workflow with nondestructive assistance) flips from great to terrible.

And that’s the crux of the issue. A lot of the things you might want to animate with a computer are on the left hand side of the graph. If you want to animate a bouncing ball then a graph editor is the right thing. It’s the right thing for motion graphics, for camera movement, and for mechanical/vehicular motion. But the right hand side of the graph? That includes all character animation. Because there is really no such thing as a character performance that isn’t complex.

Now, I do want to take a moment to discuss my use of the term “complexity” here. I’m using it because I don’t have a better term, but the term could be misleading, because what I mean here isn’t quite the same thing as visual complexity. It’s quite easy to make something that’s very visually complex through nondestructive means--think of any fractal pattern. The best I can do to nail down this definition of “complexity” is that it has less to do with number of elements present and more to do with how distinct those elements are. A painting or a character performance is extremely specific, and cannot be easily broken down into constituent elements. It doesn’t “parameterize” very well. Art that has, one might say, specific complexity is on the right side of the graph, and should be authored in as direct a manner as possible.

There is a pretty important exception to this rule: cases where the end result must be generated from inputs because it’s going to be applied to multiple sets of inputs. For instance, a compositing graph might well be complex and difficult to reason about. That’s just too bad, because “collapsing” the graph would make the results useless.

I suggest that this is an indication that compositing moving images is actually a completely different class of problem--just like rigging, compositing is in fact programming. A crucial difference here is that, unlike an animator who is either authoring inputs into the keyframe/rigging system, a compositor’s creation is the system itself, ie. the graph that will take in rendered or filmed inputs (plus inputs the compositing artist may have created like keyframes, ramps, masks, etc) and output final frames. The difference is whether what you are creating is fundamentally data that will be fed into a process (keyframes, poses, pixels, bezier handle locations, vertices, voxels, etc) or whether you are creating both data and the process that will be used to process that data (probably in the form of a node graph).

This idea isn’t at all new--Shake files used to be called “scripts” after all--but it’s not how people usually think about what a compositing artist is creating. And it’s not necessarily just true of node-graph-based systems. Are you using a lot of nested comps and complex layer interactions in After Effects? Congratulations, you’re a programmer. You’re using an extremely obfuscated system to do your programming, but that doesn’t make you not a programmer. Also, being a programmer doesn’t make you not an artist. There is nothing whatsoever mutually exclusive about those roles.

I’m really, really old***, so I remember the early days of CG. I was excited when I first saw Chromosaurus and Stanley & Stella in Breaking the Ice. I remember how much promise there was supposed to be in computer art, how the ability to tweak anything via a simple parameter was supposed to take the drudgery out of the artistic creation process. And sometimes, it did. Sometimes you got the kind of “big win” represented by nonlinear editing, which we now just call “editing” because doing things the old-fashioned way is so impractical by comparison that it barely exists. But just as often, the promise of “parameterized” art failed.

In the ensuing decades most disciplines gradually settled into an understanding of what different techniques were and weren’t good for. You generate a cityscape procedurally, but you sculpt a character. This understanding has never truly emerged for animation, and we’re still stuck with a system that is fundamentally built on a “parameterized” approach in every case. I’d go so far as to say that the fundamental assumption behind Maya is that this is the only approach, even though the actual animators and TDs using the software have been trying to turn it in other directions for the sake of their sanity for decades now.

To do something about this, it would help to gain some sort of understanding of why nondestructive techniques are good for some things and terrible for others. I don’t think this conception of the problem fully gets at all it’s aspects, but I think it’s a start.

You see, Zog? We’re a young species, but we show great promise. You were not so different, once.

*To be completely clear, by “keyframe animation” I mean animation based on curves with keyframes as control points. This is not the same, and in fact is in some ways opposed to, the concept of “key poses” as used by traditional animators.

**There are, of course, vector-based painting systems, but I’d argue that the user interacts with them more like raster painting systems then like Illustrator. The problem of nondestructive workflows is a user interaction problem--whatever the program uses to represent what the user is creating under the hood may be a separate question.

***I’m 37, but I got out ahead of the pack and started being super old at a young age. As evidence, I not only remember when “desktop video” was a thing, I remember when “desktop publishing” was a thing. For you youngsters, that’s what we now refer to as “publishing.”

Further Ephemeral Experiments

I’m using the ephemeral rig system in production right now! Unfortunately, I can’t tell you anything about it! They’re watching my house.

So far the first real production has gone smoothly, though there’s certainly room for improvement! I’ve also made a variety of updates.

One of the things I always wanted to do with the ephemeral system was to manipulate long chains like tails with a “magnet” tool, like you’d use to move vertices around. I now have this working.

The magnet I have now works as the ephemeral graph evaluation walks the chain, applying a delta based on how far the driving node has moved that cycle. Each node down the line gets 65% (a totally arbitrary number that happened to look good) of the movement of the node driving it. You could also set this up with a radius and falloff, though it would require organizing the graph a bit differently, but this was the simplest way to do it.

magnetConstraint.PNG

The magnet constraint required making some slight changes to how the graph builds. Most of the driver-drive relationships between ephemeral nodes can only go in one direction for a given mode--a node will have one possible driver in forward mode, and a different one in backward mode, but usually doesn’t have both drivers available at any one time. Magnet drivers, however, have to point in both directions (since any given node might be upstream or downstream of the node the user is controlling), which requires the graph to recognize what connections have already been established so that it doesn’t double back on itself.

Luckily, the ephemeral graph already has code to deal with a very similar situation: paired nodes also point at each other in the same mode, and also must avoid establishing circular connections when the graph is built. I was able to use the same system for magnets, though I had to tweak it slightly.

chooseDriver.PNG

The two relevant parts here are isNotDrivenByNode and chooseDriver. The first prevents circularities by rejecting as a potential driver any node that already drives this one, and the second filters a list of multiple possible pair or magnet drivers by favoring ones that are already constrained--otherwise, the node might choose to attach itself to a node further down the tail instead, and break the chain of magnet propagation. This is less of a problem for paired nodes, which all just move as a unit and don’t really care what order they’re hooked up in. (I should really stop using the term “pair,” since you can in fact hook any number of nodes up together, but it’s all over my code and I don’t really want to change it now).

Here’s another cool thing I discovered quite by accident--scaling eph nodes is actually a really useful way to effect your entire pose!

This is because of how I’m calculating the matrices of each node. Many of the interaction modes require a relationship between nodes that’s basically a parent relationship (albeit a temporary one). This would normally be achieved by simply multiplying the matrices of each node together. And that’s pretty close to what my ephemeral parent constraint class does:

parentConstraint.PNG

The constraint class calls a tiny library I wrote to wrap the Open Maya 2 classes I wanted to use in a way that would be more friendly to the rest of my code. Here’s the relevant functions from my library:

matrixCode.PNG

The parent constraint class uses transformMatrixIntoSpace to find out what the difference is between the driving and driven nodes matrices, ie. it’s putting the driven node into the driver’s space. The function does this by just multiplying it by the inverse of the driver’s matrix using om2’s existing math methods. No surprise there.

But when the constraint uses this “parentRelativeMatrix” to calculate a new matrix for the driven node, it’s not just calling multiplyMatrices--it’s calling concatMatrices, which does multiply the matrices, but then removes shear values and resets scale to whatever it was before the matrix multiplication. I did this because, unlike conventional hierarchies, any ephemeral relationship between nodes is expected to be thrown away and recreated all the time. If any of the nodes were scaled, errant scale and shear values might creep into the transforms behind my back. So I simply generate a new matrix each time with scale and shear values removed.

In practice, this creates a nice effect where scaling a given node repositions it;s children, rather then scaling them. This is particularly effective when using bidirectional/full character mode with a dummy pivot, which can be both repositioned and reoriented to create a useful axis and pivot for scaling a pose.

Finally, I've also implemented a way to merge and unmerge characters with the ephemeral system. You may recall that everything about the system assumes that every control in a character has a keyframe on the same pose--effectively, a big stack of keyframes are masquerading as a pose. Having two nodes interact ephemerally requires that they must share poses.

You may recall that I used to force every node in a character to share poses using character sets. Character sets are a feature of, of all things, the Trax Editor, and using them to enforce keyframe alignment is a bit like killing a mosquito with a bazooka, only instead of a bazooka it’s actually an ancient trebuchet and you need a couple of burly Byzantines to follow you around everywhere so they can help pull it back in case a mosquito shows up. Thankfully, It turns out that character sets aren't the only way to sync keys between nodes in Maya--Brad Clark of Rigging Dojo turned me on to Keying Groups, which serve the same function without introducing additional nodes between keyframes and their attributes, or historical siege technology.

When the ephemeral system inits, it scans the scene for everything that's tagged as belonging to an ephemeral character, and sets up keying groups for any characters it finds.

keygroups.PNG

Here again I find the "destroy it and rebuild it from scratch" principle simplifies things greatly--characters and keying groups should always be congruent in the ephemeral system, and the easiest way to ensure that is to destroy and regenerate the latter from the former any time something could have changed. That includes referencing in anything (it could be a new character!), initing the system (who knows what this file was previously doing?), or loading a file (dito).

Accordingly, merging characters is just a matter of adding a message connection between the character ident nodes that tells the system that these two characters should be treated as one when grouping up the controls into characters, and then telling the system to regenerate keying groups. Unmerging works exactly the same way. Being able to merge and unmerge characters is an important aspect of the workflow, as you might want a prop (for the purposes of this system, every ephemeral rig is a "character," including props) to share poses with one character while you work on one section of a shot, and another in some other section--for instance, if an object is being passed back and forth between characters.

Finally, I have some bad news to report--there are a couple frustrating limitations to this implementation of an ephemeral rig system I've discovered. The primary and most troublesome one is that, as it currently stand, the ephemeral callbacks and parallel eval can't be used at the same time, on pain of intermittent--but unavoidable—crashing.

While only Autodesk could answer the question definitively, my best guess at what's happening is that Maya is attempting to fire one of the ephemeral callbacks while the parallel graph is in the process of being rebuilt, causing a race condition or some other horribleness that brings Maya to it's knees. It's difficult to test, though, since the fact that this implementation of ephemeral rigging relies so completely on callbacks means that it's not really possible to test it meaningfully without them.

Luckily the rigs I'm using in current projects are fast enough that they're reasonable to use in DG mode, but this obviously isn't a long-term solution. Charles Wardlaw suggested to me that the issue might actually be that I'm using Python to create the callbacks through om2, and that I might get a different result if using the C++ API. It's going to be necessary to eventually port the system to C++ in any case for performance reasons, but I was hoping to avoid that any time soon. We'll see how things develop on that front.

The other issue has to do with manipulating multiple controls at once. So far, I've only had the ephemeral graph build when one control was selected. This doesn't stem from a limitation in the ephemeral graph itself--it can take multiple inputs with no problem, and does when building a breakdown graph--but with the need to figure out how to trigger graph evaluation from multiple callbacks. I'd planned to implement it first with one callback, and then expand that, maybe implementing a system that tracked the number of active callbacks and only evaluated the graph after the last one had fired. Once I looked more closely, though, I realized that the problem was more serious then I'd thought.

Consider a simple FK chain, like a tail. One of the most natural things to do with it is select all the controls and bend them at once to bend the tail. In an ephemeral context, however, this means that all the tail controls--which are currently being manipulated by the user--must effect each other. I'd previously been able to assume that there was a clear division between a node being manipulated by the user (from which the ephemeral system pulls) and nodes that are not (to which the ephemeral system pushes).

So while I'm sure this problem can be surmounted, it does complicate things quite a bit, and it will take some additional research to figure out the best way to approach it.

First flight

flight.png

Here’s the very first animation test using the full ephemeral rig system!

And here’s the second, recorded for your edification.

Animating these with the system was a blast—posing was just as fast as I’d hoped! In particular, you can see how easy it is to manipulate the tail, casually switching control modes as needed. It also revealed some areas I want to improve. Only allowing zeroing in forward mode, for instance, really isn’t as convenient as I’d hoped, so I’ll need to unlock that for other modes and figure out how to best present those options to the animator.

I’ve hid every aspect of the interface here that isn’t relevant to moving the rig around or scrubbing the timeline. I’m using Christoph Lendenfeld’s onion skin tool until I have a chance to reintegrate the 3D onion skins into the new system. Also, full disclosure—not every control in this rig is ephemeral. Specifically, fingers and face controls still use a conventional hierarchy, though I’m excited to start rigging faces ephemerally.

Finally, here’s a clip of Jaaaaaaaaames Baxter talking about animation technique, which I think perfectly encapsulates the workflow I want to enable for CG.

T-45 minutes and counting

I’ve now added all the features the ephemeral rig system needs to actually be used for animating a real shot, so that’s what I’ll be doing next. At 2287 lines, it is by far the largest programming project I have ever personally completed. Here’s a few words on those last, crucial features.

One obvious question that comes up about ephemeral rigging is how you zero things. Normally, you’d zero things by putting zeroes in every channel. (Except scale, or any other attribute that multiplies something else. We’ve all made that mistake at least once.)

For ephemeral rigging, this makes no sense. There is no “zeroed” space for anything to return to, except the actual center of the scene. Indeed, I intend to animate with an ephemeral rig while keeping the channel box entirely hidden! It serves no useful purpose in the interpolationless, ephemeral context.

But we can’t do away with the concept entirely. It will still be necessary to be able to return controls to some sort of “default” state. Without a meaningful parent space, the only kind of “default” that makes any sense is for ephemeral controls to be able to default to a specific relationship to each other.

Allow me to demonstrate.

To make this possible without parent spaces, I have each control store it’s default TRS values on the node as extra attributes. Because everything in the ephemeral rig is in the same space, pulling these values and building a matrix out of them is precisely the same as getting the world matrix of the node when it’s in its default position. I can therefore get those values at any time and find out where the node should be relative to any other node by comparing it’s default matrix to the default matrix of that node.

ephDefault.png

In this case, I’ve implemented zeroing through forward mode ie. zeroing a control will return it to it’s default relationship to its forward driver, and take it’s “child” controls with it. In theory there’s no particular reason that zeroing must be limited to the forward relationship. You could zero backwards, or sideways, or whatever you want. But figuring out how to make this accessible to the user in a clear way is tricky, so I’ve fallen back on the most basic functionality for the moment. I expect this will be the most common use of zeroing, in any case--while it’s completely essential to be able to zero out a control in some way, I don’t actually anticipate using it all that much.

It’s worth noting that in order to zero these controls, I actually have to build a whole ephemeral graph. Other controls may depend on them, and the controls being zeroed themselves must be zeroed in the correct order if they depend on each other. Because this is basically similar to the breakdown graph (ie. multiple controls can be used to start tracing the graph) I’ve made this a special case of the breakdown graph build.

Another new feature I’ve just added is “dummy” controls. These are temporary controls that allow you to pivot a control from any location, without actually adjusting the pivot of anything.

One thing I dislike about Maya’s transforms is the way pivot offsets get in between the ideally one-one relationship between its TRS values and its matrix. There’s a reason why we generally “buffer” a control instead of freezing transformations--adding an additional transform to cleanly change a node’s parent space is preferable to dealing with pivots.

That said, you obviously want to have pivot-like behavior, even if no actual pivots are used in the Maya transform sense. In the ephemeral rig system, this is actually rather easy to do--since there is already a concept of “pairing” nodes to allow for temporary connections between ephemeral controls, a “pivot” is simply an additional control that gets paired with whatever control you are using.

To keep with my philosophy that the ephemeral rig system never changes the topology of the Maya node graph (other then creating message connections that have no effect on the Maya scene) and does all ephemeral behavior internally, this control is not created or added as needed--it already exists in the scene, just hanging out waiting to be used. When you’re done using this “dummy” to pivot a control, it simply vanishes from view until needed again.

Finally, I’ve added a little HUD to the system that hovers around in the corner of the viewport, giving you an indication of which interaction mode in currently active. This allows me to shift changing the interaction mode back to hotkeys, which is much smoother then using the menu all the time (although I’ve left the options in the menu in case I ever need them there).

Like most of the GUI I have here, these are all represented by meshes in the scene. I know that using meshes to create GUIs is wrong, but I just can’t stop.

What even is animation?

backtothefuture.png

A message from the future! Future Raf from the distant year 2021 wants you to know that he no longer thinks of motion generation methods as being as fundamentally incompatible as he made them out to be here. In fact, some of that seeming incompatibility comes from the nature of keyframes! That’s just one of the ways that keyframes have screwed us. This post still has a lot of useful stuff about the nature of animation though!

So, this animation thing. What is it, exactly? I mean, like, on a philosophical level? Time for some navel gazing!

Animation is difficult to define, but most definitions I’ve seen rely on the concept of frame-by-frame creation or manipulation. Something recorded from the real world in real time is not animation--anything created frame-by-frame is.

I think this definition made sense before the advent of CG, but it makes very little sense now. Is a VFX shot of an explosion making use of fluid simulation, and containing no characters, animated? By this definition, it is. Is a shot that uses only motion capture data, with no intervention by an animator, animation? (I know that doesn’t happen much in real life, but bear with me.) By this definition, it is. But neither of those scenarios describe something much like the animation an animator does.

Conversely, is motion graphics animation? This definition includes that too, but in that case I think it’s clearly correct--a motion graphics artist is an animator, just not a character animator. There is something similar between the processes a character animator and a motion graphics animator use that is fundamentally different from a shot that relies purely on simulation or mocap. The conventional definition fails to “cut the problem at its joints,” and leads to a lot of misunderstanding about what animation is or isn’t good for, and how it can be used.

I think this all becomes a lot clearer if you abandon the “frame-by-frame” definition and look at animation as just one method of creating motion data. I propose that there are three main methods of authoring motion:

motionTypes.png

This is motion recorded from a performance in real time. Performance capture, puppeteering, and live action film are all methods of recording motion.

This is motion created algorithmically from a set of starting conditions. Unlike the other two, generated motion only exists in CG. This includes all simulation and most procedural animation.

This is motion defined directly by a human artist. This includes CG animation (character animation or otherwise), but also drawn animation and stop motion.

These three methods of generating motion are very different from each other in terms of how they relate to time. Recorded motion is, of course, authored in real time. Generated motion may or may not be real-time. It does, however, have an “arrow of time,” albeit one imposed by a simulation’s reliance on prior states rather than the second law of thermodynamics.

Animated motion alone allows independence from time’s arrow.* An animator builds up a shot from its “bones”—usually storytelling poses, but this applies even to the “layered” animation approach—in a way completely at odds with the basic process of either recorded or generated motion. This is both animation’s great strength (the artistic possibilities offered by this way of looking at motion) and it’s great weakness (it’s really goddamn time-consuming).

Most shots in a conventional CG production process will use some combination of these three methods. Keyframed animation will be passed to the FX department for cloth and hair sim. Motion captured motion will be adjusted and reworked by an animator. But because the processes and basic relationship to time used by each motion creation method are incompatible, using more then one will force your pipeline into an exceptionally rigid configuration.

Do you discover, after simulating a character’s clothing, that its silhouette no longer reads? You must exit the simulation process and return to the animation process—where you can no longer see the effects of your simulation. Do you discover, while reworking a motion captured performance, that it must be significantly different to fulfill the needs of the project (or the whims of the client)? Your choices are either to turn it into animated motion, or to return to the motion capture stage and throw out any work you’ve done up to that point, since a process that is not time-independent cannot be easily used to modify existing motion.

Recorded and generated motion might conceivably be made compatible in terms of process if the generated motion was calculated in real-time as the motion was recorded, but neither can be made compatible with animated motion by the very nature of the processes involved. You can’t run a simulation backwards.** The real world, meanwhile, is so famously strict about its arrow of time that reversing its direction requires violating fundamental physical laws, usually the purview of a Doctor of some sort (notable Doctors with experience in this sort of thing include Dr Emmet Brown and “just The Doctor, thanks,” although I understand that they have beef).

Interestingly, this isn’t true of many other parts of the CG production process, even though they are not used to create motion. It’s entirely possible, for instance, to animate and light a shot concurrently, updating the data in the lighting file as new animation revisions become available. The only reason we do not generally do this in the other direction, pushing lighting information to animation scenes, is just that since most lighting and shading is not intended for real-time use it wouldn’t be much use to an animator. That’s a technological limitation, not an inherent consequence of incompatible processes, and it’s one that isn’t even that hard to bridge: many studios have pipelines that use final rendered assets and their actual renderer for playblasts. Of course, the very best case scenario would be real-time rendering in-viewport.

Similarly, modeling and rigging processes do not produce the same kind of hard incompatibility as the various processes associated with motion authoring. Certainly, most riggers would prefer to have a model locked before rigging begins, but this is more of a bulwark against careless modelers and indecisive directors then an inherent incompatibility of processes—there is no reason one could not rig a base mesh while a modeler continues to work on surface detail, assuming one trusted the modeler not to make proportional changes that would cause major rig revisions (which is a very big assumption). Since I often act as modeler, rigger, and animator, I will often make modeling changes in situ.

Pipeline implications aside, the different methods of motion authoring are also fundamentally good for different things. This may seem obvious--no one tries to motion capture a dragon, simulate a main character’s performance, or animate realistic clothing behavior--but I don’t think that the differences are always fully appreciated. Specifically, there is a reason why animation lends itself so readily to comedy and action genres, and has such difficulty with subtlety.

Human perception and understanding of the actual behavior of the world around us is awful. Half the information we think we have about what happens around us is just bullshit our brains make up. This is terrible for pretty much everything we do, except art. It’s great for art, because it’s possible to appeal to those skewed expectations to create artistic effects that cannot be perceived in the real world, because they don’t actually happen.

For animation, this means appealing to human cluelessness about physics. I’m not talking about the classic “cartoon physics” cliches--walk out over a cliff and don’t fall till you look down etc--but something much more elemental about how movement is portrayed. For instance, “hang time” at the top of a character’s leap looks great to the human eye, even though the way it’s usually portrayed in animation is flat-out physically impossible. Animation can produce aesthetic effects that cannot be recorded and would be exceedingly difficult to generate, precisely because the direct, time-independent control of every aspect of movement by a human artist allows for the creation of movement that is wrong but feels right.

Conversely, aesthetic effects that rely on a great deal of fidelity to real life are precisely what animation struggles with. I want to animate clothing because I intend to animate it in a highly stylized manner--hand animating realistic clothing would be completely insane. At the far end of the spectrum you get something like a photorealistic face. Ironically, that’s pretty much the one thing we are good at perceiving, and animating one successfully is so incredibly difficult that I don’t think anyone has ever actually succeeded in doing so, even once, to this very day.

It will not surprise readers of this blog that all my interest is in animated motion, and that I have little use for the other two. Their incompatibilities with the process of animation make them a bad choice for the kind of fast production I’m interested in. However, there’s some question about whether these three categories fully encompass what’s possible. Not all procedural animation techniques necessarily have an “arrow of time,” and there is some possibility of developing some sort of “assisted animation” process where time-independent procedural techniques are used by an animator while animating. Better automatic inbetweening through an ML-assisted breakdown tool, for instance, is something me and Tagore Smith have discussed a bit in the past, and there may be some real potential there to speed up the animation process. But the potential for harmony between algorithmic and animated processes remains largely untapped. For the moment, I intend to deal with the problem by telling all procedural and simulated motion generation methods to keep their damn dirty hands off my characters.

* Stop motion animation seems like a good counter argument to my definition here--doesn’t it always have to proceed forward frame by frame, and doesn’t that give it an inherent time arrow just like generated and recorded motion? My answer would be that it still falls into the category of animated motion since arcs, poses, and performance details can all be decided on ahead of time with precision (even if they often aren’t)--indeed, I understand it’s quite common at studios like Laika for animators to “pose block” a stop motion shot for approval, and then use that as a skeleton to build the final shot on. It’s is a bit of a grey area, though.

** Some may take issue with my contention that simulation can’t be defined in a time-independent way, since simulations can have goals. While this does allow you to define what some aspects of the simulation will look like at a particular point in time, I don’t think it’s the same thing as the time-independence of the animation process, since you still can’t actually know how your simulation will reach that goal until you run it.

I have a new website

It's at https://www.rafanzovin.com!

In the process of prepping stuff for it, I gathered some stuff that had been kicking around on the web and consolidated some of it on my Vimeo page. For instance, here's a bunch of holiday card animations we sent out to people from Anzovin Studio in 2016:

And here's a promotional piece I animated while at Doodle Pictures (which is now part of Atwater Studios):

Both used interpolationless animation and partially ephemeral rigs (using the manipulator-based Phantom Tools system described in the previous post). While most of what I want to do would use very flat NPR rendering, using full rendering on the pirate piece ended up working out pretty well even though it has a variable pose rate--it gives it a bit of a stop-motiony feel.


Breakdowns and autokeying

breakdance.png

Ah, the life of an amateur programmer, so very full of backtracking because you did it wrong the first time (actually, as I understand it that might be all programmers). Now that I’ve had time to do the necessary refactoring, the ephemeral rig system supports being used to make breakdowns.

Doing breakdowns was a big part of the reason I needed an ephemeral rig system in the first place. The system we used on the Monkey test and New Pioneers, which we called Phantom Tools, had some limited ephemeral behavior built into manipulators. That made it possible to pose with a “broken” rig without having to move each part individually, though it was nowhere near as flexible as full ephemeral rigging, but it’s biggest limitation was that, being built into manipulators, it was completely separate from our breakdown tool. So breakdowns between poses that were significantly different from each other would tend to collapse, as there was no rig behavior in place while the breakdown was created.

The ephemeral rig graph, however, can now be run in either “control” or “breakdown” mode. In control mode the graph is activated by a callback placed on the node the control the user is currently manipulating, the same as I’ve been showing in the last few months of posts. In “breakdown” mode, on the other hand, the callback is instead placed on a slider object that can be used to slide the character between adjacent poses.

A note here about UI: so far, everything I’ve done for the UI on the ephemeral rig system (in-context menu aside) has been done with actual meshes in the scene. This is a really stupid way to do UI, but I ended up being backed into doing it that way to avoid even bigger headaches.

The selection map, for instance, could in theory be easily replaced by any one of many commercially available or free picker tools, and it was certainly my original plan to use mgPicker or a similar tool rather than continuing to roll my own. The problem with this is that I needed to do some pretty nonstandard stuff. For example, I wanted to be able to add stretch meters that would change color as the character was manipulated to give the user insight into how far off-model they were pulling a pose. It was necessary for this to update as the scene evaluated to be a useful indicator, and the easiest way to do that turned out to be just making it a part of the scene. No doubt I could have rolled my own QT-based interface that would have accomplished that goal, but that’s more work then I wanted to put into the picker.

The breakdown slider was originally going to be an exception to this: it’s easy enough to make a slider in a custom window that runs a command when dragged, and it’s much cleaner then having something that’s actually hanging around in the scene. The problem with this turned out to be related to how I have been running the graph and doing auto-keying.

As you may or may not recall from my earlier experiments, I’m handling auto-keying rather differently from the conventional Maya auto-keying. I want to treat poses as if they were drawings in a 2D animation package like Toon Boom, meaning that instead of keys on specific frames you have poses with duration. So if I go modify the pose on a frame that doesn’t happen to be it’s first frame (where the keyframe actually is), that doesn’t matter. I’m still modifying that pose.

Since I’m not relying on Maya’s auto-keying, I’ve needed to implement my own, and that means knowing when the user has just done something that requires setting another key. To do this, I have a global option called “doAutoKey”, and every time the ephemeral callback fires it sets this variable to True.

ephCallback.PNG

A brief note on coding style here--setting values by using get() and set() methods isn't considered to be good coding practice in Python and I really shouldn't be using them. The only reason they're present here is that I have a lot of global options I need to set and just setting them directly introduces problems with scope that I didn't know how to fix when I wrote this bit. So I ended up falling back on that particular practice because I was already familiar with it from pyMEL (which actually has kind of a reasonable excuse for that behavior that doesn't apply here) and I was in a hurry. It's not ideal and at some point I'm going to go back and purge it from my code.

Then when the user stops, I have another callback firing on each idle cycle. If the autokey option is set, it performs the autokey, and then turns it off so that subsequent idle cycles will not autokey again until the user activates it by interacting with the rig. In the old system I implemented this with a scriptJob, which was ugly. The new system just uses an idle callback, which is much cleaner.

idleCallback.PNG

In addition to performing autokey if necessary, the idle callback also builds the ephemeral graph and callback if it doesn't already exist. A callback on time change kills the graph:

onscrub.PNG

...and then, when the user has alighted on a frame, the next idle cycle triggers the idle callback, setting the current frame to be the stored frame that the eph callback function will use to determine if it should run, and then building the graph again for this new frame. (Building the graph is one of the things that the setManipModes() function does, in addition to setting the manipulation modes for the character's nodes based on the current selection.) Basically it's the same concept as my old system, except it doesn't have to check the scene for some attribute that sets the current pose, and instead just handles it all in code (and all scriptJobs have been replaced by callbacks). It's vastly simpler and less brittle.

This worked great for the ephemeral rig interaction, but when I tried to drive it with a GUI slider it fell apart completely. Turns out that interacting with a GUI slider does not prevent Maya from firing idle callbacks, causing the system to interrupt the users interaction to set keys! This actually makes sense because unlike a manipulator, which interacts directly with Maya’s graph, the slider just executes a command whenever the user changes its value, and there’s no particular reason to assume it would execute those commands fast enough that Maya wouldn’t have time to do idle cycles in-between (and indeed, if you use the Shape Editor or any other built-in slider-based interface in Maya, you will very much see idle cycles happening all the time during manipulation).

With some additional work it would have been possible to get around this. For instance, I could have created the slider in QT and turned the idle callback on and off based on mouse events. But since I already had a whole bunch of machinery set up to have things work correctly when being driven by a transform node for the ephemeral interaction, I decided it was just easier (for this prototype, at any rate) to use the system I already had set up and make the slider an object in the scene.

Building the graph in breakdown mode has a few differences from building it in control mode. Unlike building a control graph, which has a specific point where you can start tracing the graph from (the node the user is manipulating), the breakdown graph does not necessarily have a clear point of entry, or may have multiple points (as it’s possible to breakdown specific nodes while the rest of the body reacts normally). In fact, it's possible to have multiple "islands" in the breakdown graph that do not even relate to each other.

The ephemeral graph building logic turned out to be surprisingly robust here--it’s possible to throw pretty much any set of nodes, connected or otherwise, at the graph, and they’ll organize themselves appropriately and establish which ones should be driving which. The main thing I had to add was a new type of constraint, a “NoConstraint,” so that nodes that do not have any drivers can still operate in the graph. This is never needed when building the control graph, because only the critical path is ever built, ensuring that the only node that does not have an input is the control node being manipulated by the user.

breakdownDG.png

Creating the actual breakdown behavior depended on adding the ability to each node to know what it’s past and future matrices are, in addition to it’s current matrix. Because all the nodes are in world space (or at least in the same space) this wasn’t too difficult, as I can get their “world space” values right off their keyframes. Maya doesn’t usually evaluate the graph on frames other then the current frame, but you can ask it for the whole timeline’s worth of keyframes at any time. This is another big advantage of keeping all the control rig behavior outside the Maya graph--you can treat the actual world space location of each control throughout the shot as known information you can look at at any time, not something that must be evaluated before it can be known.

Here's how I look at the keys associated with a given node and figures out which ones represent the current, past, and future poses from the current time:

localPoses.PNG

Note that this is a bit more complex then just using the findKeyframe command to find next or previous keys, because, since I'm treating them as poses rather then keyframes, the "current pose" may or may not actually be on the current frame.

Finally, a word to the wise: if you ask om2 what a transform node’s rotate values are, it will quite naturally and correctly give you radians, as God intended. But the keyframes? They are probably in degrees, also called the Devil’s Unit. Mark this warning well, lest you be deceived into feeding this unholy unit to a function designed to accept only pure and immaculate radians. It’s extremely confusing.